Creating Layers
In this section, you will get to know how to create a new drawing, tactical, and vector layer. You will also get to know how to create a collection (folder) for your layers
Creating a Collection
At times, you may want to thematic collections of layers. This enables you to better organize layers in your workspace.
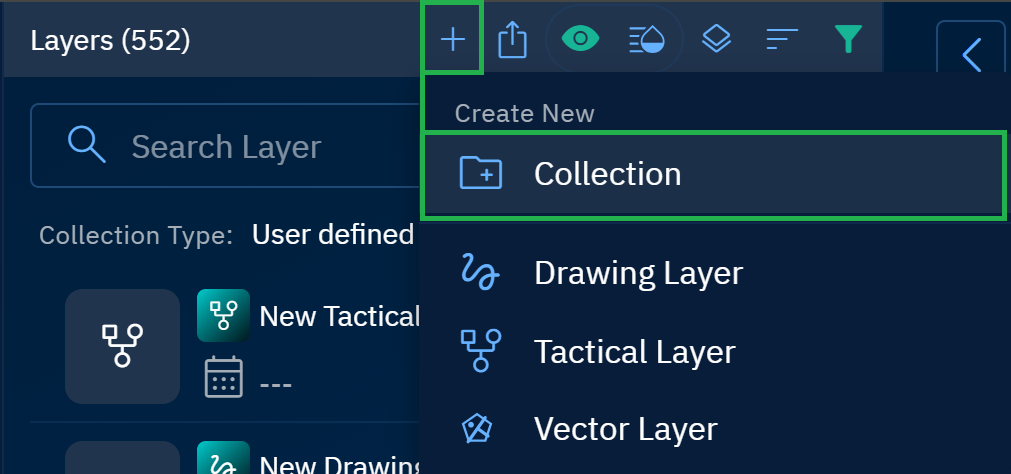
- In a workspace page, click the + on the Layers Tools Menu.
The Create New dialog box is displayed.
-
In the Create New dialog box, click the Collection option.
A New Collection folder is instantly created in the Layers panel.
-
Click the More Options menu of the new collection folder and then click the Rename option.
-
Type a new collection name and click outside to save your changes.
Creating Layers
You can create a few types of layers namely drawing, vector, and rastar layers. You can also create tactical layers for specific defense-related tasks and actions.
Drawing Layer
Go ahead and create features to symbolize anything on a map with the drawing layer. The drawing layer is like a collection of these features. You can add descriptive text and upload images to precisely annotate these features. The following type of features can be added to the drawing layer: lines, polygon, line, point, and text.
Prerequisites:
It is assumed that you have created a workspace, proceeded to open and work on the workspace.
To add a drawing layer, do the following:
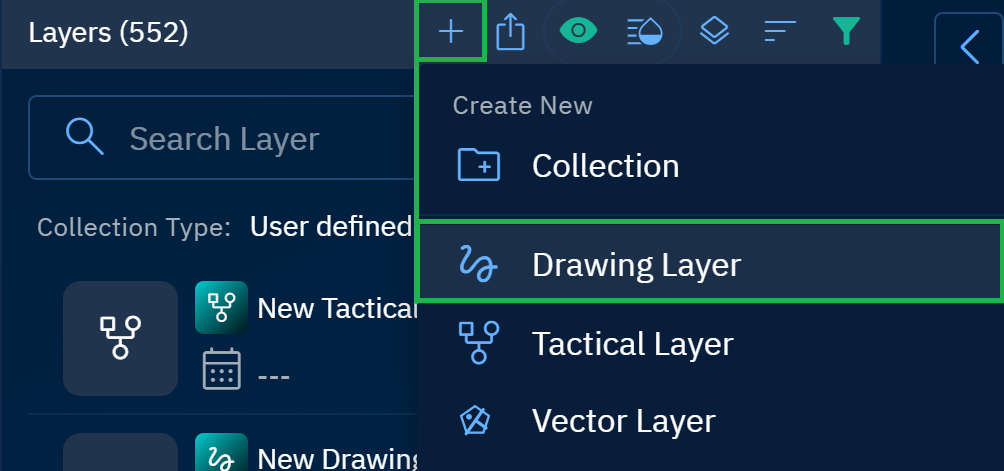
- In a workspace page, click the + on the Layers Tools Menu.
The Create New dialog box is displayed.
-
In the Create New dialog box, click the Drawing Layer option
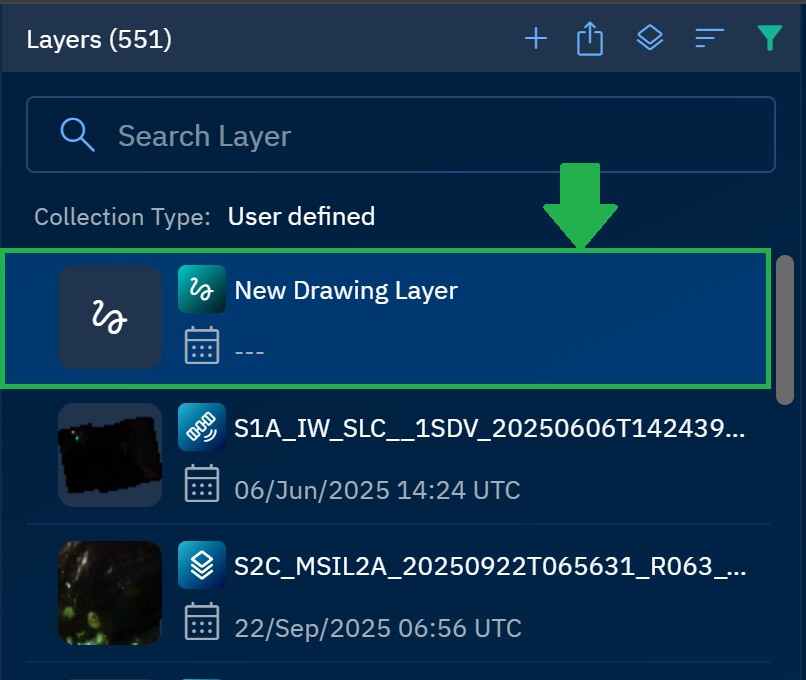
A new drawing layer is added into the Layers panel.
When you create a new drawing layer, a set of tools are activated namely:
| Tools | Tool Names |
|---|---|
 |
|
Tactical Layer
Tactical layers are specifically used in security, military, and defence usecases.
You can symbols for formations, sector boundaries, and lines of coordination.
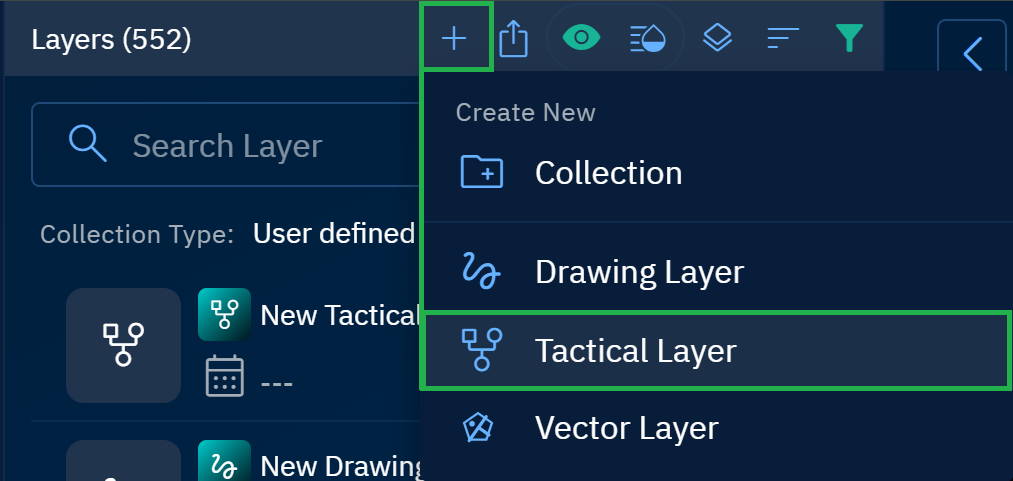
To add a tactical layer, do the following:
- In a workspace page, click the Export icon on the Layers Tools Menu.
The Export Layers dialog box is displayed.
-
In the Export Layers dialog box, click the Tactical Layer option
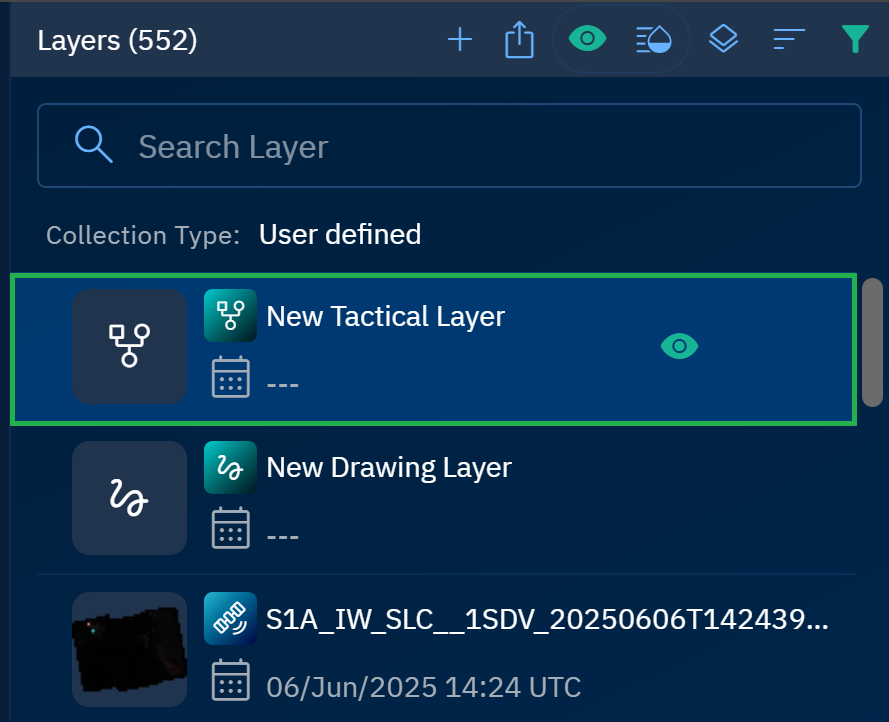
A new drawing layer is added into the Layers panel.
When you create a new drawing layer, a set of tools are activated namely:
| Tools | Tool Names |
|---|---|
 |
|
- Select the layer, click the < arrow to open the Contextual Panel of the layer, and then do the following:
- Click the Formations, insert the fomations symbols on the layer as per your requirements.
- Click the Sector Boundaries, insert the sector boundaries symbols on the layer as per your requirements.
- Click the Lines of Coordination, insert the lins of coordination symbols on the layer as per your requirements.

Vector Layer
Vector layers store geographic data as points, lines, polygons, or text that represent discrete real-world features. However, you can also add attributes that are fundamental components of vector data that provide contextual information about geographic features.
When you add attributes to a vector layer, you are essentially defining a structured data schema that:
-
Contextualizes spatial data: Transforms geometric points, lines, or polygons from mere spatial entities into information-rich features with specific properties.
-
Enables complex analysis: Facilitates spatial queries, filtering, and analysis based on non-spatial characteristics.
-
Supports data integrity: Enforces data type constraints (for example, ensuring population figures are stored as numbers, not text).
-
Enhances interoperability: Creates standardized structures for data exchange between different GIS systems and databases.
With vector layers, you can visualize geospatial information using symbols, text, and graphics while enabling precise analysis and measurement of geographic relationships.
To create a vector layer, do the following:
-
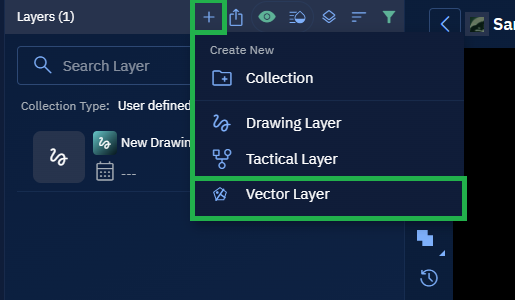
In a workspace page, click the + icon in the Layers Ribbon.
The Create New dialog box is displayed.
-
In the Create New dialog box, click the Vector Layer option.
A New Vector Layer dialog box is displayed.
-
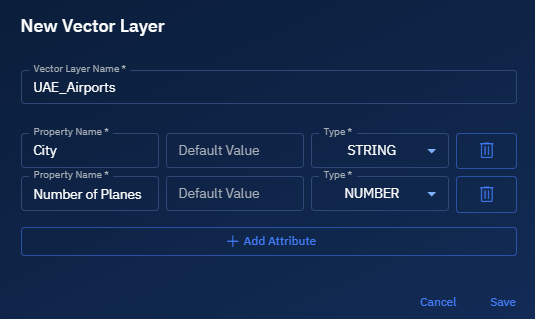
In the New Vector Layer dialog box, do the following:
-
Type name of the vector layer in the Vector Layer Name field. For example, UAE_Airports.
-
Click the Add Attribute button to add contextual information about geographic features (that you draw or insert in the vector layer).
The attribute columns Property Name, Default Value, and Type are displayed.
-
-
In the New Vector Layer dialog box, enter the attributes for features that you will be adding in the vector layer.
For example, you want to record the airports in major cities in the UAE and the commercial planes present on these airports.
Then you must add the following attributes displayed in the screenshot:
-
Click Save to save the vector layer with the attributes.
Vector Layer with Temporal Attributes
In the following procedure steps, we will see how to upload a .csv dataset (consisting temporal data) to the platform and visualize the data.
Pre-requisites: Keep the .csv dataset with temporal attributes ready.
To create a vector layer with temporal attributes, do the following:
-
Locate the workspace where you want to upload .csv dataset with temporal attributes and the open the workspace.
-
Click the Upload button.
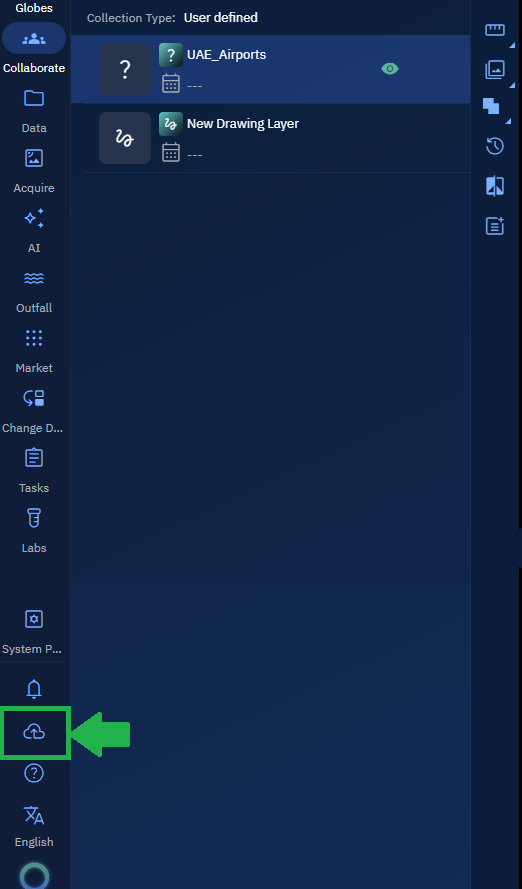
The File Upload dialog box is displayed.
- In the File Upload dialog box, do the following:
-
Click the Browse button to select the dataset you want to upload.
-
Select the Add all to workspace thereby adding the dataset to the workspace you have opened.
-
Click the + icon to open to the Data Mapping dialog box which enables you to specify how different columns in the .CSV should be interpreted within the platform.
-
Click Apply to set the data mapping.
-
Confirm mapping is successfully applied and then click Upload to upload the .CSV to the platform.
-
Click Close to close the File Upload dialog box.
-

The layer (.csv file) is uploaded successfully in the workspace.
-
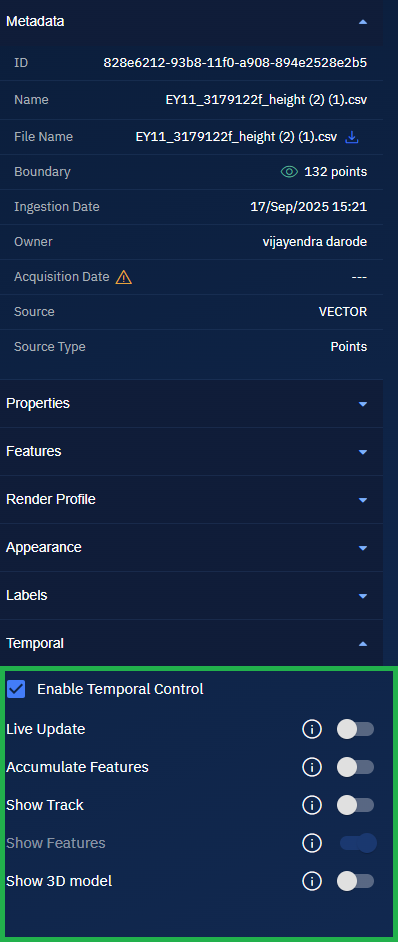
Select the layer in the Layers panel in the workspace and click the < button to open the layer Properties contextual panel is displayed.
-
In the Properties contextual panel, click the Temporal section.
-
In the Temporal section, select the Enable Temporal Control checkbox to enable temporal attributes of the layer.
THE Timeline widget and the following options are displayed.

-
Turn on the appropriate following options as per your requirement and then click the Play button on the Timeline widget to visualize your temporal data.